Reinstallation of mac os with removal. How to completely reinstall mac
MAC OS, like Windows, sometimes requires reinstallation. This may be due to the slow operation of your MAC device or in connection with the sale of it (I do not think that you will be satisfied with the sale of a MAC with your personal information). Or, on the contrary, buying a MACBOOK (PRO, AIR) or iMAC with a bunch of incomprehensible files or unnecessary programs. In general, there can be many reasons for reinstalling MAC OS. In this article, I will describe in detail how to reinstall MAC OS and get a "clean" operating system.
So, before you start, you need to transfer all the necessary information to external media, since after reinstalling MAC OS, it will be almost impossible to recover anything.
In order to reinstall MAC OS you need:
1 Connected to a MACBOOK (PRO, AIR) or iMAC power source;
2 Internet access with MACBOOK (PRO, AIR) or iMAC;
3 This article and about an hour of time.
To reinstall MAC OS using the method described below, you need to use OS 10.7 or higher (10.8, 10.9). In order to check which version of the operating system you have installed, click on the apple in the upper left corner and select "About this MAC". The window that opens will contain information about the installed version of MAC OS.
If you are using a version older than 10.7, you need to update it.

You should have loaded the "OS X Utilities", if this did not happen, repeat the procedure with a reboot and pressing the shortcut keys "COMMAND" + "R".
Select "Disk Utility".

IMPORTANT!!! The following steps will erase all data on your disk, so you need to be sure that the files you need are not on the MAC.
Then select the disk with the system, on the right, open the "Erase" tab and click the "Erase" button.

Confirm the deletion by clicking the "Erase" button.

Then close the "Disk Utility" window and select "Reinstall MAC OS".

After that, confirm the installation, click the "Continue" button. With the release of the new OS X 10.10, OS X Yosemite will be installed.
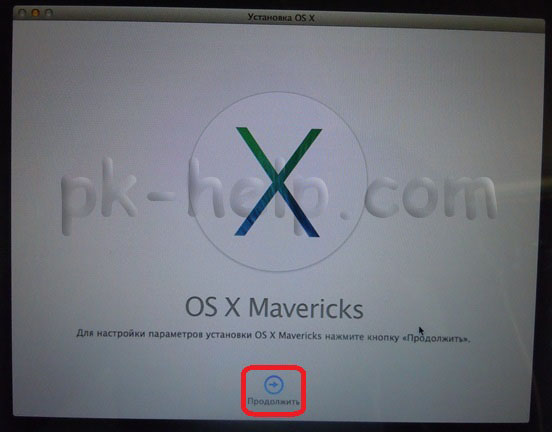
In the next information window, click "Continue".

The next step is to read the license agreement and accept it.


Then select the installation drive. In this case, the choice is obvious. Click the "Install" button.

This will start the download process for MAC OS.

After that, the MAC will automatically reboot and the installation of the MAC OS will start.

After the installation is complete, you will receive a "clean" operating system MAC OS, all that remains is to set some settings.
The next step is to select the country where you plan to use MACBOOK (PRO, AIR) or iMAC.

Select your keyboard layout.

You can connect to a Wi-Fi network (you can skip this step if you want).

If you want to recover data made earlier using Time Machine or from a Windows computer, select the appropriate item, if you do not plan to recover anything, select "Do not transfer any information" and click "Continue". The data that you transferred to external media can be transferred later.

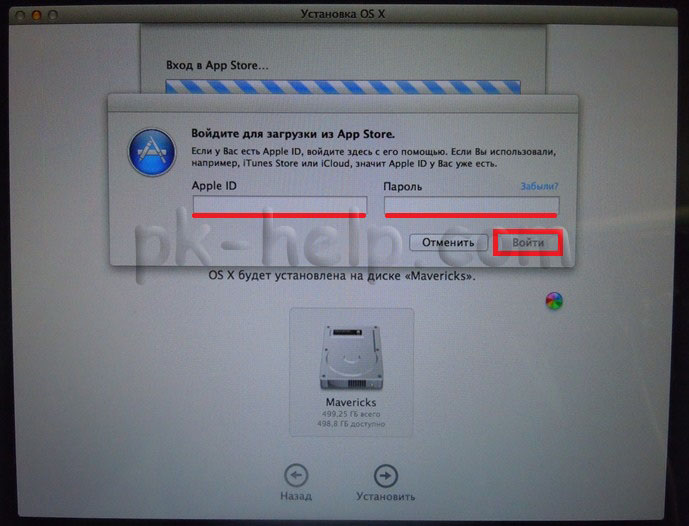
The next step is to sign in with your Apple ID. In this example, I will not do this.

Then you read the license agreement and accept it.

After that, enter your credentials (login and password) and click "Continue".

As a final step, you can register your MAC (this step is optional).

And in the end you will get a "clean" MAC OS.
Video of reinstalling the MAC OS operating system on iMAC / MACBOOK PRO / AIR.
In my opinion, the installation of MAC OS is simplified to impossible, even disks with the operating system are not required - pressing a few keys + an hour of time and you have a "clean" MAC OS.
After some time getting to know OS X Sierra, to which I updated my imac from the app store quite recently, I got the idea to go back to EL Capitan. As it seemed to me at that time. what could be easier!
As expected, taking an image of the system, a flash drive, after reading smart articles on the Internet, I started to implement my plan.
The flash drive was cut in 20 minutes, everything seems to be ready. I insert the flash drive and reboot, I press ⌘ Cmd and R, respectively, I get to the installation window. Without remorse, I go into the disk utility and erase the disk with the installed system, since it will not work to put EL Capitan on top of Sierra, the version of the installed system is older than the installed one.
The disk is clean, I continue to install! And here at this place, as they say, "Swam." Mac complains about an error in the installation image:
“This copy of the Install OS X EL Capitan program could not be verified. It may have been damaged or changed during the download process. "

I didn't have a classic of the Time Machine backup genre either. I was left with a clean laptop without an installation flash drive, seriously thinking how much I got into installing the system in an Apple service center.
But the solution turned out to be quite simple, most likely I am not the first to erase, and then I think, but now not about that.
Apple specialists foresaw this situation in advance, albeit with minor restrictions! For each MacBook, Mac Pro and other apple products, Internet Recovery is initially created, from which you can restore the system with access to Wi Fi. The backup contains initially installed version systems, that is, if you had a purchase of Mavericks, then Mavericks will be restored, and not EL Capitan, to which you updated and used!
So, here's a list of actions:

Installation can take quite a long time, since the firmware file weighs several gigabytes and it will be downloaded from Apple servers. It is worth reiterating that the version of the firmware with which the Mac was bundled will be installed.
To avoid such situations, use Time Machine - it will help you save time and hassle from lost files.
The operating system MacOS X is a proprietary development of Apple and is installed on all computers of its production. Thanks to tight integration and hardware, it is highly stable and efficient. Once a year, a new version of this OS is released, and during its lifespan, updates are regularly released to fix the detected errors. How to reinstall Mac OS X on your computer, and what installation options are available, we will tell in this material.
Terms of distribution
Mac OS X is a proprietary operating system, the first version of which was released in 2001. Over the next twelve years, it was distributed on a paid basis, and all versions of it bore "cat" names. The first in this series was OS 10.0 "Cheetah", the last - 10.8 "Mountain Lion".
Beginning with version 10.9, macOS is distributed free of charge, and codenames are assigned to the geographical objects located in the state of California. The first operating system in this series was released in 2013 and named Mavericks, after the popular California beach.
In 2016, Apple changed one of the clauses in its user license agreement. Since then, macOS is considered not acquired, but rented from the company for the duration of the use of its technology. However, this change mostly affects those users who use the so-called MacOS on a third-party computer.
Updating from the App Store
The easiest way to install a new version is to download it from the App Store. Let's see what in this case needs to be done and how. You can reinstall Mac OS X in this way on any Apple computer, the hardware of which will support the capabilities of the latest version. operating system.

To download, you need a working OS and Internet access. On the App Store home page, in the "Quick Links" section, the most current version of Mac OS available for your computer will be located first. Going to the page of the operating system, select the "Download" option, and in the "Applications" folder you will see its image with the name "Install Mac OS", the current build number and an indicator showing the progress of downloading it from the company's servers.
After receiving the image on the computer, it remains only to run it as a normal program. In the future, without your participation, it will go through several reboots, and you will be able to use the latest Apple operating system.
Installing from the recovery partition
Over time, the hardware requirements grow, and even if your laptop officially supports new version, it can work more efficiently on the old one. Let's look at how on a MacBook, without changing the OS to a newer one. In this case, we also need a connection to the World Wide Web.

At the time of loading, you must use the keyboard shortcut Command + R. It takes you to the recovery menu and chooses how to reinstall Mac OS. You will be able to update to the latest supported version or to the latest used one. By choosing the second option, you will actually install back the OS on which your laptop showed the best performance.
When using the restore function, there is also the option to return the version of the operating system with which you purchased the computer. If you decide to perform such an operation, you will need to use a more complex keyboard shortcut at the initial stage of the boot. While holding Shift + Command + Option + R and when asked how to reinstall Mac OS, select the option to install the system that came with it.
Installing from a USB stick
After new versions of Apple OS are released, a clean install may be required to activate all available features. In this case, you need to know how to reinstall Mac OS from scratch using a bootable USB flash drive. This option is not much more complicated than the previous ones, and the only thing you need is an external drive with a size of at least 8 GB and named Untitled. You can rename it using the "Disk Utility" program from the OS.

First, you need to download the boot image to your computer using the method described above. Once it is received, you can start creating your own bootable USB flash drive. We will use only the standard tools of the operating system itself and create an installation disk using the Terminal program. Copy the command below into its window:
sudo / Applications / Install \ macOS \ Sierra.app/Contents/Resources/createinstallmedia --volume / Volumes / Untitled --applicationpath / Applications / Install \ macOS \ Sierra.app --nointeraction
To complete it, you will need an administrator account or knowledge of an administrative password. If before that you followed our recommendations exactly, then after no more than half an hour you will have installation disk with the latest version of OS X Sierra.
Finally
In this article, you learned how to reinstall Mac OS on your computer, and what are the options for accomplishing this task. As you can see, the process of reinstalling the "apple" operating system is quite simple and most of the time it will take you to download its image. Having coped with this task, you can consider yourself a real poppy-breeder.
Sooner or later, the day will come when you need to reinstall the Mac OS operating system on your MacBook PC. This task is no more difficult than reinstalling Windows. This is what will be discussed.
Why and how to reinstall the operating system on a MacBook
The reasons for reinstalling the Mac OS operating system on a Mac are:
- damage or wear of the built-in storage (HDD);
- Selling or donating a MacBook to another person
- "Moving" to another MacBook (newer model, but keeping the previous version of the MacOS system);
- transferring data to Apple gadgets or to another computer.
What is the reinstallation of MacOS:
Clearing the boot volume if necessary
Then check out the articles from this article. You will be prompted to select a boot volume, select the volume and click "Install". ... This way, you can restore your system from the recovery partition if something goes wrong. Some users may find it helpful to look at the contents of the Applications folder for later reference. A screenshot may be sufficient, but if not, the following steps describe an easy way to create a list of apps.
The process will take a few minutes to complete, so leave it in working order. And it is especially helpful for the new user to have a nice clean car that is back in its factory condition. Most people don't have this feature enabled.
- "From scratch", including formatting the built-in disk;
- reinstallation "over", with the preservation of personal data and applications (MacOS update).
For example, using the MacAppStore, you can upgrade OS X Lion and OS X Mountain Lion to the newer OS X Mavericks.
The procedure for selling or transferring your Mac to another user is as follows. It should be specially mentioned.
But it's always best to check. But you are allowed to allow up to 5 computers. Don't worry, you don't lose content and nothing gets deleted from your computer. When you deactivate a computer, you prevent it from accessing protected content. And you can authorize your computer later if needed.
Don't save this step for later. If you sell or give away a computer that still has one of your five authorizations, you need to de-authorize all of your computers and then re-authorize all that you are still using. It's a hell of a lot of hassle and time for something you can do now before giving or selling.
- Backing up personal data from MacBook to a separate medium or "cloud" service.
- Disabling special services and functionality that control copying and data transfer.
- Erase all personal information from disk.
Attention! Before proceeding to reinstall macOS on your MacBook PC - take the trouble to save all your data to external media! This will be discussed first.
Here you can see the number of computers that you have allowed in the past. Unfortunately, it does not list the names of these computers. Therefore, if this number does not agree with you, try to de-authorize your computer several times until it is no longer allowed.
Deactivate programs and remove other permissions
Also, select Deauthorize All Computers to clear five permissions. Then re-authorize all of your computers one at a time. Many third-party applications include authorization and activation of the machine, in particular programs for editing images, sound and video. Application activation is the process of connecting a specific application to a valid user license.
Backing up data with Time Machine
Time Machine is designed to back up personal files from your MacBook and restore them back to it. But it requires external USB drives (HDD, SDD drives) formatted with macOS Extended or Xsan - FAT / NTFS file systems designed for Windows and Android are not supported. If the disk was previously formatted in FAT / NTFS formats, the MacBook will not accept it if it refuses to reformat “for itself”.
You must activate your app before you can use it. On the other hand, deactivation disconnects the application from a valid user license. After deactivation, you can reactivate this license at any time on any computer.
Therefore, check the list of applications, look for programs that require activation of keys. Once you are in, go to the program menu bar and find the deactivation or deauthorization link. Its utilities allow you to completely erase the internal hard drive.
Reinstall Mac OS X and Apple Software
Once posted, download and install it from this product page. We install a lot of apps, updates, and maybe even think about the operating system software through terminal or third party apps.
Time Machine launches from MacOS System Preferences in the Apple Menu. When connecting an external hard drive, a corresponding notification will appear.
Do you really want to destroy all data written to this drive in a different format?
If the external drive has already been formatted, Time Machine will give the go-ahead to use it. Confirm your request.
This is real and expected use. This is the value and price of experience. And the new owner starts a fresh start - without the clutter left over from all your previous apps, preferences, etc. Important! We have a workaround that should allow you to back up and restore your message history on your desktop, however we cannot guarantee that it will work. Enter "Terminal" and open the app.
Copy and paste the phone number folder to another location. Follow the steps below to clean up, reinstall. Don't forget to empty the trash after. Still experiencing the same issues? Until now, the malware has been well documented and not viral, so for any given variant it is installed in one location and launched from there to affect the system. As a result, when a variant has been characterized, you must remove it from your system following the detailed instructions.
Are you sure you want to copy your data to this drive?
If Time Machine doesn't show you the drive selection, do the following.

How to reinstall Mac OS from an installation flash drive
The preliminary steps are as follows.
Updating from the App Store
This is the recommended approach; however, it relies on malware definitions that have been defined for malware, which may lag behind the initial results of malware. If you decide that it would be best if you played it safely and wiped your system and started over by following this procedure, you should be able to do so while saving your data.
Synchronization and backup First of all, make sure that your system is properly synchronized with your cloud services to ensure that items such as contacts and calendars are saved. Doing so will allow you to recover some of these items without relying on sync services to manage them for you. When you're done with the backup, unmount and disconnect the external hard drive you used for the backup. Do not choose the option to restore from a backup. Restoring data from a backup. The next step is to copy the data to the system from the backups. If your contacts and calendars are missing, you can re-import them manually from previously created backups. Once you've installed your apps, be sure to update them completely, and then open and customize them according to your preferences. At this point, your system should be back to working order and you should be able to continue your workflow as it was before reinstalling. In addition to syncing, make sure your system backup is. ... The final step in this process is to protect against further infection.
- Download the Mac OS X installation image from the Mac App Store or third-party sites.
- When the download is complete, right-click on the downloaded file and select Show Package Contents.
- Go to the / Contents / SharedSupport / folder, copy the InstallESD.dmg file to a safe location on the disk and mount it on your MacOS desktop.
We need the Disk Utility application included with MacOS. Further steps are as follows.
Install a reverse firewall to help detect and block programs from calling home to remote servers, and consider installing an antivirus utility. While you don't need to configure your antivirus tool to thoroughly scan all files on demand, you can configure it to scan only shared folders for download, and then once a week, or perhaps once a month, to scan the entire system. For now, despite the latest malware news, this should be enough to prevent malware and provide you with ample protection.


Click on the install button
Creating a USB stick

After downloading the update from the Appstore, proceed as follows:
- We launch the disk utility;
- In the left pane, select the drive, on the right - go to the "Disk Partition" tab;
- In the "Partition Scheme" menu, select the "Partition 1" item. The disc name is "Yosemite", the format must be "Mac OS Extended (Journaled)".
- Go to Options, select the GUID Partition Scheme. Click "Apply".
- Disk Utility starts formatting the flash drive.
- Launch Terminal from the Utilities folder.
- To create a USB flash drive, run the following command:
- Enter the administrator password.
- It will take 10-15 minutes to create a bootable USB drive.
- After successfully completing the procedure, restart your Mac. Hold Alt while loading.
- You are ready to install Mac OS X Yosemite.
Installing Yosemite
After creating a USB flash drive and restarting the Mac, follow the instructions:
- Go to the "Downloads" menu and select "Mac OS X Installer".
- You need to open "Disk Utility" and select the disk with the system to format. Go to the "Erase" tab.
- In the "Format" menu - "Mac OS Extended (Journaled)" must be selected, the name of the disk is written.
- Click "Erase", thereby starting the process of formatting the disk.
- Close "Disk Utility" and open the "Install Mac OS X" section.
- Specify the Yosemite boot disk and start the installation process.
Starting the installation process assumes following the instructions of the installer. Select the required parameters, the system will be ready for use soon. After Mac installations OS Yosemite You can start from scratch or transfer files from Time Machine.
Reinstall Mac OS X Yosemite
If OS X Yosemite is already installed, you may need to reinstall it in the following cases:
- System crashes;
- Errors when installing updates;
- Disk cleaning;
- The need to restore factory settings.
So, let's answer the question, how to reinstall Mac OS X Yosemite... To do this, you need to erase your Mac data and reinstall the system. Don't forget to back up your valuable files. To restore factory settings, you need to use the built-in recovery disc. Reinstalling the system requires an internet connection and a connected power adapter.
The order is simple:
- Reboot your Mac. During boot (gray screen) press Command + R.
- Select the item "Disk Utility", click "Continue".
- Select the disk, click "Erase".
- In the Format section, select Mac OS Extended (Journaled), enter a name, and click Erase.
- The disk is cleared, it will take some time.
- Select the item "Disk Utility", click "Finish".
- Go to "Reinstall OS X", click "Continue".
- We select the used disk. In most cases, it is the only one available.
- We follow the instructions of the installer and finish.
- The system is reinstalled!
The Mac OS X operating system is rightfully considered one of the most reliable and stable, but, unfortunately, it is not completely immune from troubles. That is why a Mac user needs to know how to reinstall Mac OS X via Recovery on his own. This reinstallation is available in all Apple operating systems starting from Mac OS X 10.7 Lion. Recovery mode allows you to download the current version of the operating system if you have an Internet connection and install it without having to write files to media. Reinstalling Mac OS X via Recovery is very convenient for MacBook owners, since most new laptops are released without an optical drive, and creating a bootable USB drive can be quite a hassle, especially for a beginner.
Apple developers have provided an opportunity not only to download the operating system from the network, but also to restore from a backup using Time Machine, as well as to fix files using a special "Disk Utility". If you notice that your Mac's operating system is not working as before, you should start fixing the problem by checking the disk of the standard "Disk Utility". If eliminating the errors did not help, then you should think about restoring Mac OS X through Time Machine or downloading operating system files from the Internet. We'll take a look at how to reinstall Mac OS X from the Internet.
How to enter Recovery mode
- Make sure your Mac is connected to the Internet first.
- Turn off your computer in the usual way. Sometimes, when the OS "freezes", this cannot be done using the menu - in this case, the device is turned off using the Power button
- Wait 30-40 seconds (this is done in order not to damage HDD device) and turn on your Mac with the power button. Immediately after switching on, hold down ⌘Cmd and R on the keyboard.
- After completing the above steps, the Mac OS X Utilities menu appears on the computer screen.

- Connect to the Internet via Wi-Fi
- Select "Reinstall Mac OS X" from the list
- Please be patient, as the volume of OS files is quite impressive and a lot depends on the speed of the connection to the Network.